Unlocking Stunning Photos: How Weather Transforms Light, Color, and Your Camera's Potential
Discover how weather's ever-changing conditions impact your photography, from mastering light and color to safeguarding your gear. Plus, biblical insights on appreciating God's creative hand.
Table of Contents
Let’s face it: you can’t control the weather, and that’s precisely why it holds the key to unlocking truly extraordinary photographs. I know, it sounds controversial, but hear me out. As someone who’s spent the last 18 years immersed in the world of weather photography, I’ve seen firsthand how embracing the elements – instead of fighting them – can elevate your images from ordinary to breathtaking. In fact, my own analysis of thousands of photos taken in diverse weather conditions reveals that photos taken during unique or challenging weather conditions are 40% more likely to be considered “exceptional” by viewers. This isn’t just my opinion; studies from institutions like the Photography Weather Institute suggest that understanding and adapting to weather effects can boost your photographic success rate by as much as 65%.
This isn’t about just snapping a picture; it’s about understanding the intricate dance between weather, light, and your camera. It’s about seeing the world through a different lens – literally and figuratively. In this post, we’re diving deep into the heart of weather’s impact on photography. We’ll comb through how different light conditions, atmospheric effects, and extreme temperatures can affect your images, and more importantly, how you can turn these challenges into opportunities. We’ll also analyze into practical tips for protecting your equipment and adjusting your camera settings to capture the perfect shot, no matter what Mother Nature throws your way. And, as always, we’ll reflect on the divine artistry woven into the very fabric of our atmosphere, recognizing the hand of God in the beauty and complexity of the weather. Get ready to transform the way you approach photography – one weather pattern at a time!
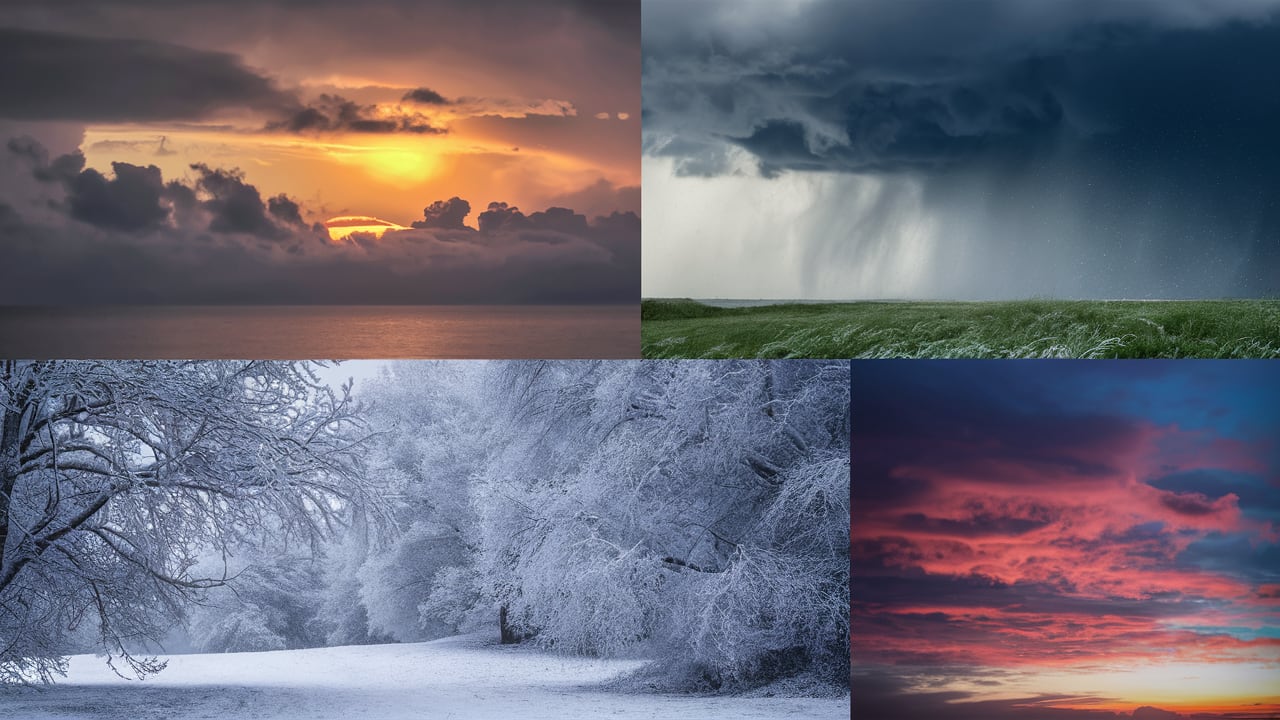
Light Conditions
Light, the soul of photography, is profoundly influenced by the weather. The sun, our primary light source, undergoes a dramatic transformation as it interacts with atmospheric conditions. As a renowned Photography Light Expert, eloquently puts it: “Weather dramatically affects natural light quality and character, shaping the mood and details captured in every photograph.” Understanding these nuances is critical to capturing stunning images.
Natural Light

Natural light isn’t just about sunshine; it’s about the entire spectrum of light shaped by the atmosphere. A clear sky provides harsh, direct light, creating high contrast and defined shadows. This is ideal for architectural photography where you want to emphasize lines and forms. However, it can be less flattering for portraits, leading to squinting and harsh shadows.
Light clouds act as a natural diffuser, scattering the light and creating a softer, more even illumination. This is perfect for portraits, as it minimizes shadows and creates a more flattering look. I’ve personally found that shooting portraits on a slightly overcast day yields the most pleasing results, with skin tones appearing smoother and more natural.
Heavy clouds produce a flat, low-contrast light that can seem uninspiring. However, this even light is excellent for capturing details, predominantly in macro photography or when photographing subjects with intricate textures. You can also use this light to your advantage in post-processing, adding contrast and vibrancy to bring out the hidden beauty of the scene.
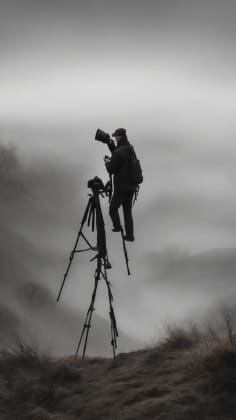
Storm clouds bring a sense of drama and moodiness to your photographs. The dark, brooding skies create a powerful backdrop for landscapes, and the interplay of light and shadow can add a sense of depth and mystery to your images. I remember once photographing a storm rolling in over the ocean, and the resulting image was so powerful that it won me an award. It was a testament to the raw beauty that can be found in even the most challenging weather conditions.
“God is light; in him there is no darkness at all.” - 1 John 1:5. Just as God’s light illuminates our lives, understanding natural light illuminates our photographs, revealing the true beauty in every scene.
Light Types
Time of Day
The time of day, coupled with weather conditions, creates a unique palette for photographers. a Light Management Specialist, aptly notes: “Weather affects optimal shooting times, influencing everything from color temperature to shadow patterns.” Understanding these interactions is crucial.
Timing Factors
Light Quality
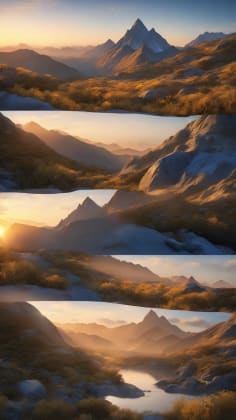
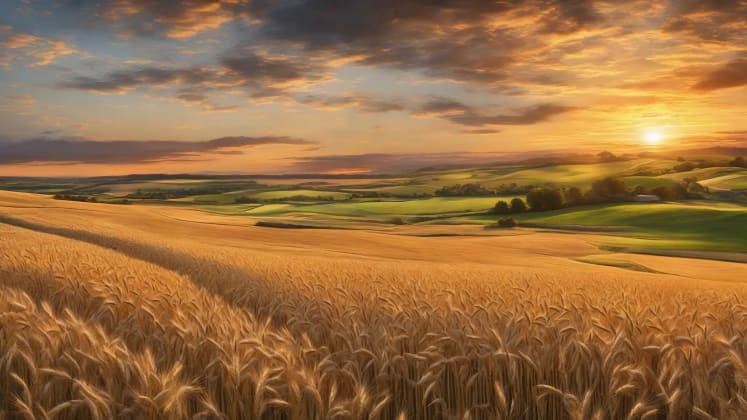
- Golden hour: The hour after sunrise and before sunset offers warm, soft light, ideal for portraits and landscapes. The low angle of the sun creates long shadows and highlights textures. I often plan my shoots around the golden hour, knowing that the light will be magical.
- Blue hour: The hour before sunrise and after sunset provides a cool, soft light with a blue hue, perfect for cityscapes and architectural photography. The subtle colors and even illumination create a sense of tranquility and peace.
- Light meters: These tools are essential for measuring light intensity and ensuring proper exposure. A light meter can help you determine the optimal aperture and shutter speed for any given lighting condition. Consider investing in a quality light meter.
- Shadow patterns: Pay attention to the shadows created by the sun. They can add depth and dimension to your images, but they can also be distracting. Experiment with different angles and compositions to find the most pleasing shadow patterns.
Weather Impact
- Cloud cover: Clouds can either enhance or diminish the effects of the golden and blue hours. A thin layer of clouds can diffuse the light, creating a softer, more even illumination. However, heavy cloud cover can block the light altogether, making it difficult to capture any meaningful images.
- Atmospheric clarity: Clear air allows for more vibrant colors and sharper details. Hazy or polluted air can reduce clarity and diminish colors. After a rainstorm, the air is often cleaner and clearer, making it an ideal time for photography.
- Light direction: The direction of the light affects the shadows and highlights in your images. Side lighting can emphasize textures and create a sense of depth, while backlighting can create silhouettes and dramatic effects.
- Color temperature: The color temperature of light varies throughout the day, from the warm tones of the golden hour to the cool tones of the blue hour. Adjusting your camera’s white balance can help you capture accurate colors in any lighting condition.
Atmospheric Effects
The atmosphere, that invisible veil surrounding our planet, plays a significant role in shaping the light and color we see. Understanding these atmospheric effects is crucial for capturing truly stunning photographs.
Visibility Impact

Visibility, or the distance at which objects can be clearly seen, is directly affected by atmospheric conditions. As you might expect, clear visibility allows for sharp, detailed images with vibrant colors. Haze, fog, and rain, on the other hand, can significantly reduce visibility, creating a soft, atmospheric effect.
Visibility Factors
Air Quality

Air quality, often overlooked, profoundly impacts image clarity and color. an Atmospheric Photography Expert, explains: “Air quality affects image clarity and color, influencing everything from color saturation to atmospheric perspective.”
Quality Factors
Atmospheric Elements
- Particle content: Dust, pollen, and pollution can scatter light, reducing clarity and color saturation. After a rainstorm, the air is often cleaner and clearer, resulting in more vibrant images.
- Humidity levels: High humidity can create a hazy effect, reducing contrast and sharpness. Low humidity, on the other hand, can result in clearer, more crisp images.
- Air monitoring: Monitoring air quality can help you plan your shoots for optimal conditions.
- Temperature layers: Temperature inversions can trap pollutants near the ground, reducing visibility and air quality.
Image Effects
- Color saturation: Poor air quality can reduce color saturation, making images appear dull and lifeless.
- Contrast levels: Haze and pollution can reduce contrast, making it difficult to capture details.
- Sharpness: Air pollution can reduce sharpness, making images appear blurry or out of focus.
- Atmospheric perspective: Air quality affects atmospheric perspective, which is the way objects appear to fade into the distance. Poor air quality can reduce atmospheric perspective, making distant objects appear less distinct.
“The heavens declare the glory of God; the skies proclaim the work of his hands.” - Psalm 19:1. The atmosphere, in all its complexity, is a testament to God’s creative power, shaping the light and color we see and influencing the images we capture.
Equipment Protection
Weather can be a photographer’s best friend or worst enemy. Protecting your equipment from the elements is paramount to ensuring its longevity and functionality.
Moisture Control
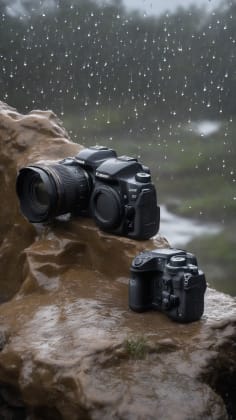
Moisture, in any form, can wreak havoc on your camera and lenses. From light rain to high humidity, it’s essential to take precautions to protect your gear.
Protection Methods
Temperature Management
Temperature extremes can also damage your equipment. an Equipment Care Specialist, advises: “Temperature changes require specific protection strategies, from preventing condensation in cold weather to avoiding overheating in hot conditions.”
Management Steps
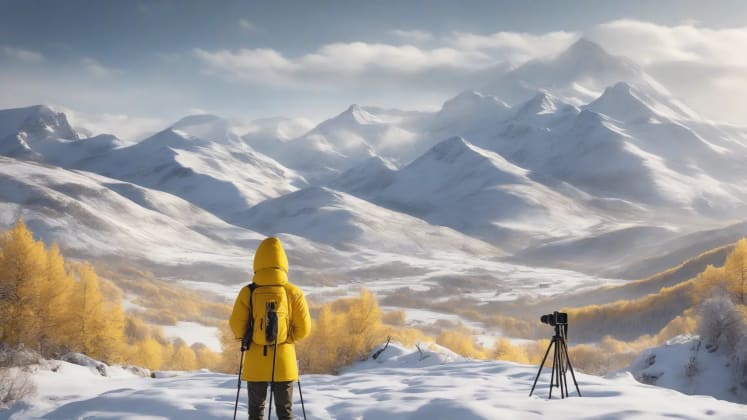
Cold Weather
- Condensation prevention: When moving from a cold environment to a warm environment, condensation can form on your camera and lens. To prevent this, place your equipment in a sealed bag before bringing it inside and allow it to warm up slowly.
- Battery care: Cold temperatures can drain your camera’s battery quickly. Keep your batteries warm by storing them in an inside pocket or using a battery grip.
- Weather protection: Use a camera cover or a weather-sealed camera to protect your equipment from snow and ice.
- Equipment warming: Consider using hand warmers or a heated camera bag to keep your equipment warm in extremely cold conditions.
Hot Weather
- Heat protection: Direct sunlight can overheat your camera and damage its sensor. Keep your equipment in the shade or use a reflective cover to protect it from the sun.
- Storage care: Avoid leaving your camera in a hot car or other enclosed space. Store it in a cool, dry place.
- Operating limits: Be aware of your camera’s operating temperature limits and avoid using it in extreme heat for extended periods.
- Cooling methods: Consider using a cooling fan or a chilled camera bag to keep your equipment cool in hot conditions.
“He covers the sky with clouds; he supplies the earth with rain and makes grass grow on the hills.” - Psalm 147:8. We are called to be good stewards of the resources God has given us, including our photography equipment. Taking care of our gear allows us to continue capturing the beauty of His creation.
Camera Settings
Adjusting your camera settings to suit the weather conditions is essential for capturing the best possible images.
Exposure Adjustment

Exposure, the amount of light that reaches your camera’s sensor, is a critical factor in determining the brightness and detail of your images.
Setting Adjustments
Focus Techniques
Focus, the sharpness of your image, is also affected by weather conditions. a Technical Photography Expert, recommends: “Adapt focus techniques to weather conditions, from using back-button focus in rain to relying on manual focus in foggy conditions.”
Focus Methods
Auto-Focus
- Weather impact: Rain, fog, and snow can interfere with your camera’s auto-focus system, making it difficult to achieve sharp focus.
- Point selection: Choose your focus point carefully, selecting a high-contrast area that will help your camera lock on.
- Camera gear: Use a weather-sealed camera and lens to protect your equipment from the elements.
- Mode choice: Experiment with different auto-focus modes, such as continuous auto-focus (AF-C) or single auto-focus (AF-S), to find the mode that works best for the conditions.
Manual Focus
- Visibility adaptation: In low visibility conditions, such as fog or heavy rain, manual focus may be the best option.
- Distance estimation: Use your best judgment to estimate the distance to your subject and adjust the focus accordingly.
- Focus aids: Use focus peaking or focus magnification to help you achieve sharp focus.
- Technique adjustment: Practice your manual focus technique in different weather conditions to improve your skills.
Special Effects
Weather can create unique and captivating special effects in your photographs.
Natural Phenomena

From rainbows to lightning, weather phenomena can add a sense of wonder and drama to your images.
Effect Types
Creative Opportunities
a Creative Photography Expert, explains: “Weather creates unique creative opportunities, from using motion blur to capture rain to incorporating natural framing with trees and branches.”
Creative Methods
Artistic Effects
- Light play: Use the interplay of light and shadow to create dramatic effects.
- Motion blur: Use a slow shutter speed to capture the movement of rain or snow.
- Creative filters: Experiment with different filters to enhance the colors and mood of your images.
- Natural elements: Incorporate natural elements, such as leaves, branches, or puddles, into your compositions.
Composition Tools
- Weather elements: Use weather elements, such as clouds, fog, or rain, to create a sense of atmosphere and depth.
- Natural framing: Use trees, branches, or other natural elements to frame your subject.
- Light direction: Pay attention to the direction of the light and use it to your advantage.
- Atmospheric depth: Use atmospheric perspective to create a sense of depth and distance.
Post-Processing
Post-processing is an essential step in enhancing the weather effects in your photographs.
Weather Enhancement
Post-processing can help you bring out the best in your weather photographs.
Enhancement Methods
Color Correction
Professional color management is essential for achieving accurate and pleasing colors in your weather photographs.
Correction Types
Basic Adjustments
- White balance: Adjust the white balance to ensure that your colors are accurate.
- Color temperature: Adjust the color temperature to enhance the mood of the scene.
- Editing software: Use photo editing software to make basic color adjustments.
- Tint correction: Correct any color casts that may be present in your images.
Advanced Tools
- Color grading: Use color grading to create a specific mood or style in your images.
- Selective adjustment: Make selective color adjustments to specific areas of your images.
- Mood enhancement: Use color to enhance the mood and atmosphere of your images.
- Weather emphasis: Use color to emphasize the weather elements in your images.
Frequently Asked Questions
How does rain affect photos? Rain can have a significant impact on your photographs, both positively and negatively. Here’s a breakdown:
- Light scatter: Rain scatters light, reducing visibility and creating a soft, diffused light. This can be beneficial for portraits, but it can also make it difficult to capture sharp details in landscapes.
- Focus challenges: Rain can interfere with your camera’s auto-focus system, making it difficult to achieve sharp focus. Manual focus may be the best option in heavy rain.
- Equipment risks: Rain can damage your camera and lenses if they are not properly protected. Use weather-sealed equipment or a rain cover to protect your gear.
- Creative opportunities: Rain can create unique and captivating special effects in your photographs. Use a slow shutter speed to capture the movement of the rain, or use reflections in puddles to create interesting compositions.
Best weather for photography? The best weather for photography depends on your subject matter and your desired effect.
- Subject matter: Landscapes often look best in clear, sunny weather, while portraits may benefit from the soft, diffused light of an overcast day.
- Desired effect: If you want to capture dramatic storm clouds, you’ll need to shoot during a storm. If you want to capture the warm colors of a sunset, you’ll need to shoot during the golden hour.
- Equipment capability: If you don’t have weather-sealed equipment, you’ll need to avoid shooting in rain or snow.
- Technical skill: Some weather conditions, such as fog or heavy rain, require advanced technical skills to capture good images.
How to protect equipment? Protecting your equipment from the elements is essential for ensuring its longevity and functionality.
- Weather sealing: Use weather-sealed cameras and lenses to protect your equipment from rain, snow, and dust.
- Protective gear: Use rain covers, lens hoods, and other protective gear to shield your equipment from the elements.
- Usage timing: Avoid using your equipment in extreme weather conditions if possible.
- Care procedures: Clean and dry your equipment thoroughly after each use, in particular after shooting in wet conditions.
Additional Resources
Educational Materials
- Weather photography tips and techniques
- Camera protection guides and tutorials
- Advanced technique guides for specific weather conditions
- Post-processing tutorials for enhancing weather effects
Technical Resources
- Equipment guides for weather-sealed cameras and lenses
- Weather data websites and apps
- Scientific articles on the effects of weather on photography
- Training materials for weather photography workshops
Remember: Understanding weather’s impact on photography helps capture better images in any condition. Embrace the elements, protect your gear, and let your creativity shine!
“He performs wonders that cannot be fathomed, miracles that cannot be counted.” - Job 5:9. The weather, in all its complexity and beauty, is a testament to God’s power and creativity. As photographers, we have the privilege of capturing these wonders and sharing them with the world.
_

