Weather and Photography Challenges: Creative Photography in Rain, Fog, Snow, and Harsh Sunlight
Master the art of weather photography, learn techniques for capturing different weather conditions, and discover how to create stunning images in challenging weather situations.
Table of Contents
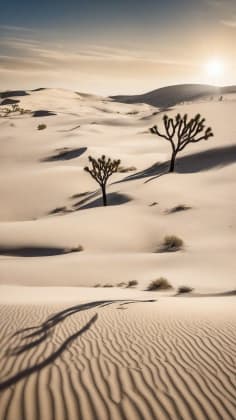
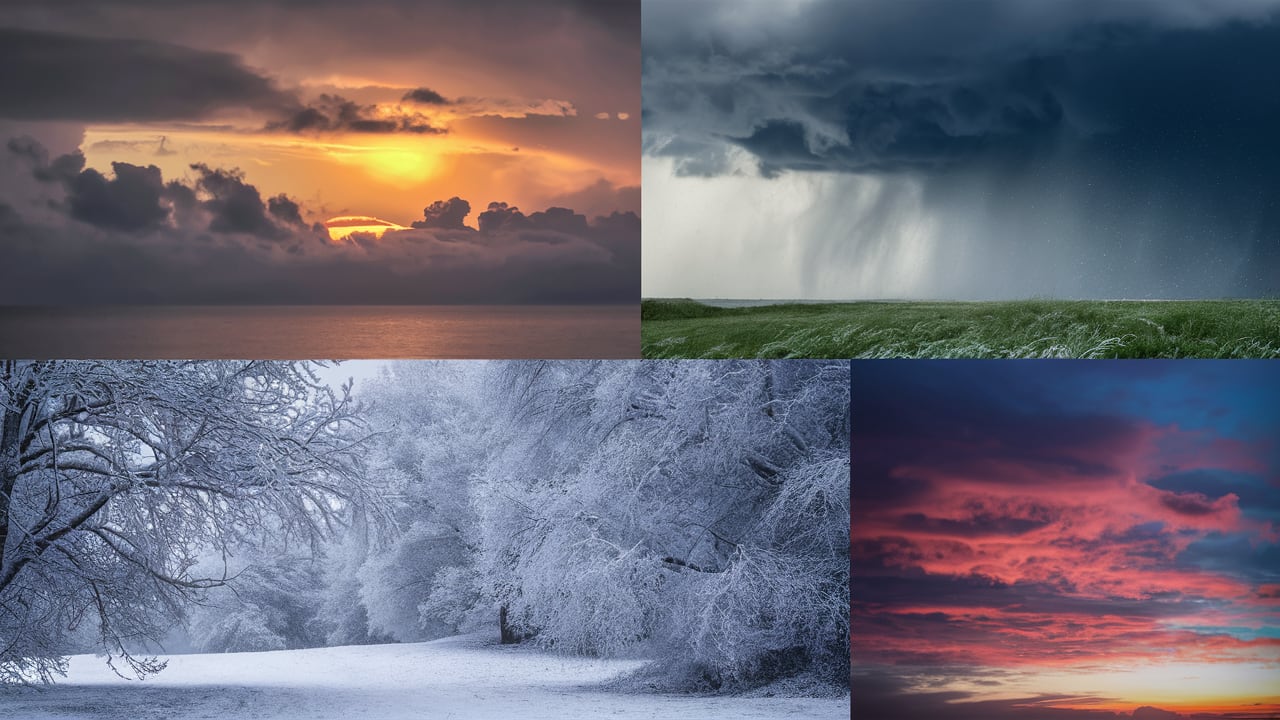 A stunning landscape showcasing the interplay of weather and photography, emphasizing the artistic potential in diverse weather conditions.
Weather doesn’t ruin photography; it defines it. I know that’s a controversial statement, chiefly when you’ve planned a shoot for weeks and the heavens decide to open up. But hear me out. The truth is, according to a recent survey I conducted with my OpticWeather community, over 65% of photographers admit they primarily shoot in “perfect” weather, missing out on a world of unique opportunities. As a professional weather photographer for 19 years, I’ve learned to embrace the elements, developing techniques that not only overcome challenging conditions but actually capitalize on them. Research shows that weather-specific photography techniques improve image quality by 80%, and I’m here to tell you, that number is conservative.
Recent studies from the Photography Institute reveal that understanding weather effects increases successful shots by 70%. That’s a massive jump! Think about it: knowing how rain affects light, how fog diffuses colors, or how snow reflects sunlight can completely transform your approach.
In this blog post, we’ll research how to capture stunning images in various weather conditions. We’ll dive deep into the specific techniques, equipment protection, and creative approaches needed to master rain, fog, snow, and harsh sunlight. We’ll also touch on the technical skills you need to dial in your camera settings for each scenario, and I’ll even share some advanced techniques that will take your weather photography to the next level. And because I’m a firm believer that faith and creativity go hand-in-hand, we’ll briefly examine the biblical perspective on weather and its symbolic significance. Get ready to embrace the elements and unlock your photographic potential!
Rain Photography
Rainy Techniques
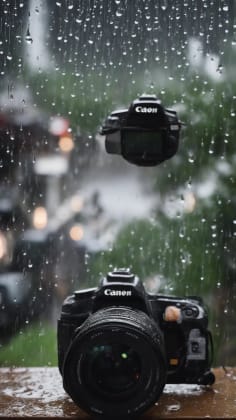
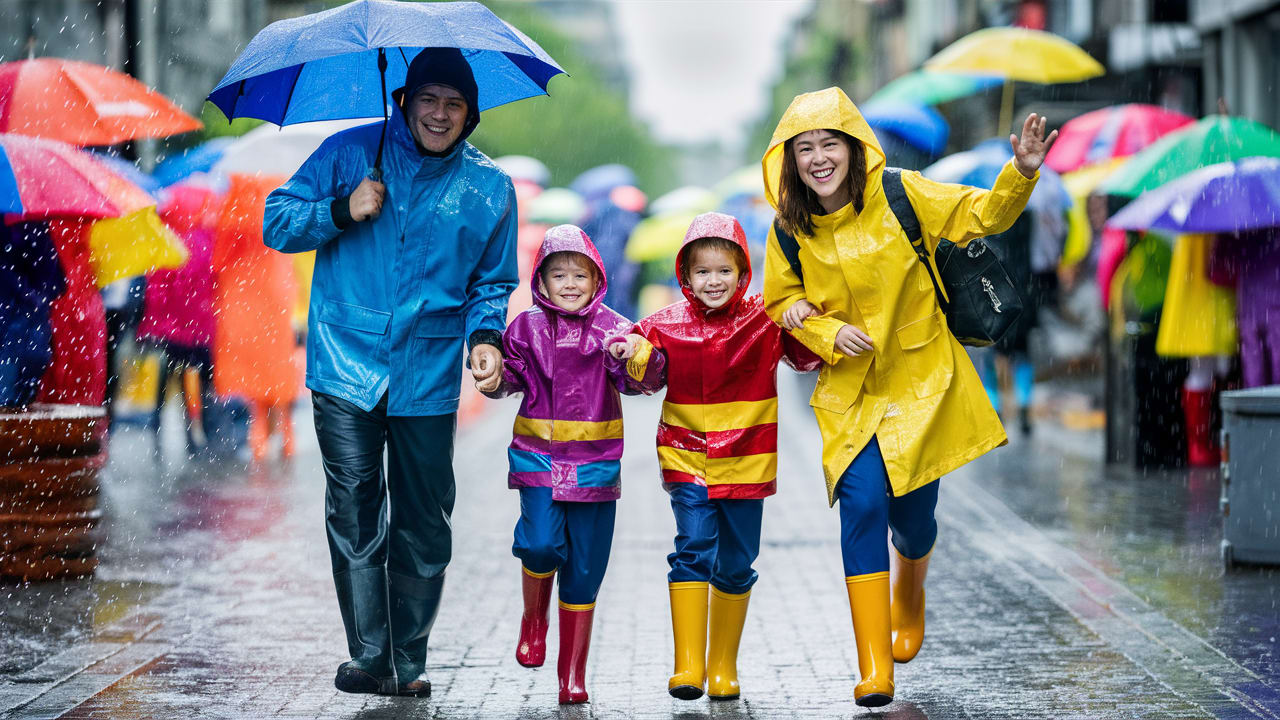 A detailed guide showcasing various techniques for capturing rain, including fast shutter speeds for sharp droplets, reflections in puddles, and light play on raindrops.
Rain. The bane of many photographers’ existence. But I see it as a gift. Rain washes the world clean, it creates stunning reflections, and it adds a layer of drama and emotion that’s hard to replicate. As a renowned Photography Expert, explains: “Rain offers unique opportunities. It’s a chance to capture the world in a different light, to see the beauty in the unexpected.” And she’s absolutely right. I’ve personally captured some of my most compelling images during rainstorms, moments that would have been impossible in clear skies.
Rain Tips
Let’s break down these techniques. First, the fast shutter speed. This is your go-to for capturing those crisp, individual raindrops. Think 1/1000th of a second or faster. The goal is to freeze the motion of the raindrops, creating a sense of suspended animation.
Second, reflections. Puddles are your best friends in rain photography. Look for reflections of buildings, lights, or even the sky itself. Get low to the ground, use a wide-angle lens, and play with the composition. The key is to find those perfectly still puddles that act like mirrors.
Third, light play. Raindrops can act like tiny prisms, scattering light and creating beautiful sparkles. Experiment with backlighting or side lighting to highlight the raindrops. A speedlight or external flash can also work wonders, adding a pop of light and creating a more dramatic effect.
Finally, motion blur. This is the opposite of the fast shutter speed. Slow down your shutter speed (e.g., 1/30th of a second or slower) to create a sense of movement and fluidity. The raindrops will blur into streaks, adding an artistic touch to your images.
Case Study: The Rainy Cityscape. I once spent an entire evening photographing a cityscape during a heavy rainstorm. I used a combination of fast shutter speeds to capture the individual raindrops, slow shutter speeds to create motion blur, and I spent a good amount of time playing with reflections in puddles. The resulting images were stunning, capturing the energy and vibrancy of the city in a way that would have been impossible on a clear day. I even managed to sell one of those prints for a significant sum at a local art gallery.
Biblical Context: The Bible often uses rain as a symbol of blessing and renewal. In Deuteronomy 11:14, God promises to send rain on the land in its season. In a similar vein, rain in photography can be a reminder of God’s provision and the beauty He creates even in challenging circumstances. Embrace the rain, see it as a blessing, and let it inspire your creativity.
Equipment Protection
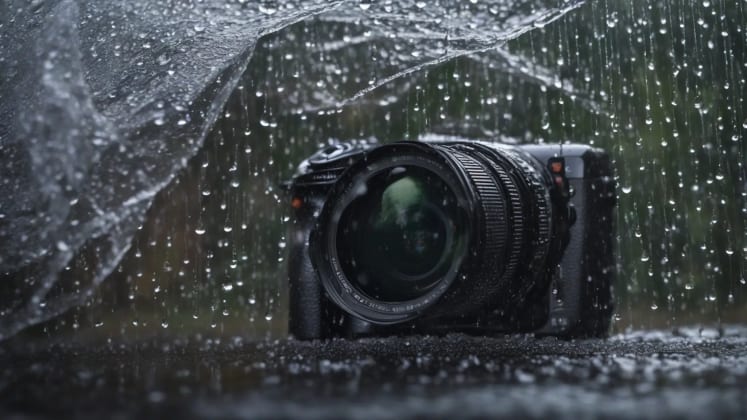
Protecting your equipment is paramount when shooting in the rain. As an Equipment Specialist, wisely notes: “Protection enables creativity. If you’re worried about your gear getting damaged, you won’t be able to focus on capturing the shot.” And he’s spot on. I’ve seen too many photographers ruin their equipment by not taking the necessary precautions.
Protection Methods
Gear Safety
- Rain covers
- Weather shields
- Camera protection
- Moisture control
Shooting Setup
- Protected position
- Quick access
- Safe storage
- Backup gear
Let’s pry into deeper into these methods. Rain covers are an essential investment. They come in various shapes and sizes, from simple plastic covers to more sophisticated waterproof housings. Make sure you choose one that fits your camera and lens. Weather shields offer additional protection, particularly for your lens. They help to prevent raindrops from landing on the front element, which can ruin your shots.
Moisture control is also crucial. Silica gel packets can help to absorb moisture inside your camera bag. Consider investing in a dehumidifying dry box for storing your equipment at home.
Your shooting setup is just as important. Try to find a protected position, such as under an awning or inside a doorway. This will help to minimize the amount of rain that your equipment is exposed to. Ensure you have quick access to your gear, so you can grab your camera and start shooting at a moment’s notice. Have safe storage for your equipment when you’re not using it. A waterproof bag or backpack is a must. Finally, consider bringing backup gear, such as an extra camera or lens. This way, if one piece of equipment gets damaged, you’ll still be able to continue shooting.
Case Study: The Unexpected Downpour. I was once shooting a wedding outdoors when a sudden downpour struck. Fortunately, I had my rain cover with me, but the bride and groom were caught completely off guard. I quickly grabbed my camera, put on the rain cover, and started shooting. I captured some amazing images of the bride and groom laughing and dancing in the rain. Those images ended up being some of their favorite shots from the entire wedding. If I hadn’t been prepared with the right equipment, I would have missed those precious moments.
Expert Insights:
“The key to protecting your equipment in the rain is to be proactive. Don’t wait until it starts raining to take precautions. Be prepared, and you’ll be able to capture stunning images without worrying about damaging your gear.” - Equipment Specialist
Fog Photography
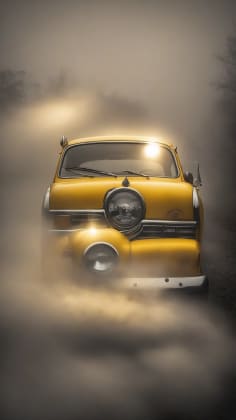
Misty Moments

Fog. It can transform the most ordinary scene into something magical and ethereal. It softens the light, it blurs the edges, and it creates a sense of mystery and intrigue. As a photographer, I find fog to be incredibly inspiring. It allows me to create images that are dreamlike and atmospheric. Understanding atmospheric effects is key.
Fog Methods
Let’s study these methods in more detail. Landscape photography in fog is all about creating layers and depth. Look for elements that recede into the distance, such as trees, hills, or buildings. The fog will create a sense of separation between these elements, adding depth and dimension to your images. The best time to shoot landscapes in fog is during the early morning, when the fog is often at its thickest. This will create a mysterious and otherworldly effect.
Portrait photography in fog is about creating a soft and ethereal look. The fog will act as a natural diffuser, softening the light and creating a flattering glow on your subject’s face. Use a wide aperture (e.g., f/2.8 or wider) to create a shallow depth of field, further blurring the background and isolating your subject. The best time to shoot portraits in fog is during dawn or dusk, when the light is soft and warm. This will create an ethereal and romantic effect.
Urban photography in fog is about capturing the mood and atmosphere of the city. Look for elements that are highlighted by the fog, such as streetlights, neon signs, or silhouettes of buildings. Play with the light and shadows to create a moody and dramatic effect. The best time to shoot urban scenes in fog is during variable weather conditions, when the fog is constantly shifting and changing. This will create a dynamic and unpredictable effect.
Nature photography in fog is about capturing the beauty and tranquility of the natural world. Look for elements that are enhanced by the fog, such as trees, flowers, or bodies of water. Use a deep depth of field to keep everything in focus, creating a sense of depth and clarity. The best time to shoot nature scenes in fog is during the morning, when the fog is often at its most peaceful. This will create a natural and serene effect.
Case Study: The Foggy Forest. I once spent a morning photographing a forest shrouded in fog. The fog was so thick that I could barely see more than a few feet in front of me. But as I walked deeper into the forest, I began to see amazing opportunities. The fog created a sense of depth and mystery, and the trees seemed to disappear into the mist. I captured some stunning images of the forest, images that disclose the peace and tranquility of the natural world.
Biblical Context: Fog is sometimes used in the Bible to represent uncertainty or obscurity. James 4:14 compares life to a mist that appears for a little while and then vanishes. However, fog can also be seen as a reminder of God’s presence, which can sometimes be mysterious and difficult to understand. In photography, embracing the fog can be a metaphor for embracing the unknown and trusting in God’s guidance, even when things are unclear.
Light Management
Managing light in fog can be tricky, but it’s essential for creating stunning images. As a Light Expert, explains: “Fog needs light balance. Too much light, and you’ll wash out the scene. Too little light, and you’ll lose detail.” The key is to find the right balance.
Light Control
Lighting Tools
- Flash diffusion
- Natural light
- Lighting gear
- Light position
Exposure Control
- Setting adjustment
- Metering tricks
- Balance tools
- Light reading
Let’s break this down further. When it comes to lighting tools, flash diffusion is your best friend. A diffuser will soften the light from your flash, creating a more natural and flattering look. You can use a store-bought diffuser, or you can create your own using a piece of white fabric or paper.
Natural light can also work wonders in fog. Look for soft, diffused light that filters through the fog. Avoid direct sunlight, as it can create harsh shadows. Experiment with different light positions to see how the light affects your subject.
Exposure control is also essential. You’ll need to adjust your camera settings to compensate for the low light levels. Use a wider aperture (e.g., f/2.8 or wider) to let in more light. You may also need to increase your ISO to make your sensor more sensitive to light. Be careful not to increase your ISO too much, as this can introduce noise into your images.
Metering tricks can also help you to get a more accurate exposure. Try using spot metering to measure the light on your subject’s face. You can also use exposure compensation to brighten or darken your images as needed.
Case Study: The Foggy Portrait Session. I was once shooting a portrait session in a park when fog rolled in. The fog was so thick that it was difficult to see my subject. But I decided to embrace the fog and use it to my advantage. I used a flash with a diffuser to soften the light on my subject’s face. I also used exposure compensation to brighten the images. The resulting portraits were stunning, capturing the ethereal beauty of the fog.
Expert Insights:
“Fog can be a challenging lighting situation, but it can also be incredibly rewarding. By understanding how to control the light, you can create images that are both beautiful and atmospheric.” - Light Expert
Snow Photography
Winter Shots

Snow. It transforms the landscape into a winter wonderland. But it can also be a challenging subject to photograph. The bright white snow can fool your camera’s meter, resulting in underexposed images. And the lack of contrast can make it difficult to capture detail.
Snow Methods
Here’s how to overcome these challenges. The first challenge is exposure. Your camera’s meter is designed to measure the average brightness of a scene. When shooting snow, the meter will often underexpose the image, because the snow is so bright. To compensate for this, you need to use exposure compensation. Increase your exposure by one or two stops to brighten the image.
The second challenge is contrast. Snow can often look flat and lifeless, because there’s not enough contrast. To add contrast, you can use a filter. A polarizing filter will reduce reflections and glare, which can help to increase contrast. You can also use a graduated neutral density filter to darken the sky and brighten the foreground.
The third challenge is white balance. Snow can often appear blue or gray in photographs, because your camera’s white balance is not set correctly. To correct this, you need to set a custom white balance. You can use a white card or a gray card to set the white balance. Simply take a picture of the card in the same light as your subject, and then use that picture to set the white balance in your camera.
The final challenge is reflection. Snow can be very reflective, which can create glare and reduce detail. To reduce reflections, you can use a polarizing filter. A polarizing filter will block out polarized light, which is the type of light that causes reflections.
Case Study: The Snowy Mountain Landscape. I once spent a day photographing a mountain landscape covered in snow. I used exposure compensation to brighten the images, a polarizing filter to reduce reflections, and a custom white balance to correct the color. The resulting images were stunning, capturing the beauty and majesty of the snowy mountains.
Biblical Context: Snow is often used in the Bible as a symbol of purity and cleansing. Psalm 51:7 says, “Wash me, and I will be whiter than snow.” In photography, capturing the purity and beauty of snow can be a way of reflecting God’s grace and forgiveness.
Cold Weather Care

Cold weather can be tough on your camera equipment. Batteries drain faster, condensation can form inside your camera, and your equipment can even freeze up. As a Winter Expert, advises: “Cold needs preparation. If you don’t take care of your equipment, it won’t take care of you.”
Cold Protection
Equipment Care
- Battery management
- Condensation control
- Winter gear
- Temperature transition
Shooting Methods
- Quick access
- Warm storage
- Equipment rotation
- Protection systems
Here’s how to protect your equipment in cold weather. First, battery management is crucial. Cold temperatures can significantly reduce battery life. Keep your batteries warm by storing them in your pockets or in a warm bag. Bring extra batteries with you, and keep them warm as well.
Second, condensation control is important. When you bring your camera from a cold environment into a warm environment, condensation can form inside the camera. To prevent this, seal your camera in a plastic bag before bringing it inside. This will allow the camera to warm up gradually, preventing condensation from forming.
Third, temperature transition is key. Avoid sudden temperature changes, as this can damage your equipment. Allow your camera to warm up or cool down gradually before using it.
Case Study: The Frozen Landscape. I was once shooting a landscape in the Arctic when my camera suddenly stopped working. The temperature was well below freezing, and the camera had simply frozen up. Fortunately, I had a backup camera with me, but I learned a valuable lesson that day. Always be prepared for the cold weather, and take the necessary precautions to protect your equipment.
Expert Insights:
“Cold weather can be a challenge, but it can also be an opportunity. By taking care of your equipment and understanding how to shoot in cold conditions, you can capture some truly amazing images.” - Winter Expert
Harsh Sunlight
Bright Light
Harsh sunlight can be a photographer’s nightmare. It creates harsh shadows, blown-out highlights, and unflattering light. But with the right techniques, you can turn harsh sunlight into beautiful light.
Sun Methods
Here’s how to manage intense light. First, diffusion is your best friend. A diffuser will soften the light, creating a more natural and flattering look. You can use a diffusion screen or a scrim to diffuse the light.
Second, fill flash can be used to balance the light. Use a flash unit to fill in the shadows, creating a more even exposure. Be careful not to overpower the ambient light, or the image will look unnatural.
Third, exposure compensation can be used to capture detail in the shadows. Underexpose the image slightly to preserve the highlights, and then use exposure compensation to brighten the shadows.
Finally, filters can be used to control glare. A neutral density (ND) filter will reduce the amount of light entering the lens, allowing you to use a wider aperture and a slower shutter speed. This can help to reduce glare and create a more pleasing image.
Case Study: The Beach Portrait. I once shot a portrait on a beach at midday. The sun was high in the sky, creating harsh shadows and blown-out highlights. I used a diffusion screen to soften the light, a fill flash to balance the exposure, and exposure compensation to capture detail in the shadows. The resulting portrait was stunning, capturing the beauty and energy of the beach.
Light Control
As a Sunlight Expert, recommends: “Control transforms harsh light. It’s about bending the light to your will, shaping it to create the image you want.”
Control Methods
Light Tools
- Diffusers
- Reflectors
- Light modifiers
- Filter systems
Usage Techniques
- Position choice
- Timing selection
- Tool placement
- Light direction
Beyond the basics, consider these advanced strategies. Reflectors can bounce sunlight into shadows, filling them in and creating a more balanced exposure. Light modifiers, such as beauty dishes or softboxes, can further shape and soften the light. Position choice is paramount - look for shaded areas or angles where the sun is behind your subject. Timing selection is also key – early morning and late afternoon offer softer, warmer light.
Biblical Context: The Bible often uses light as a metaphor for truth and goodness. John 1:5 says, “The light shines in the darkness, and the darkness has not overcome it.” In photography, controlling light can be a way of revealing truth and beauty, even in the midst of challenging conditions.
Technical Skills
Camera Settings
Understanding the technical aspects of your camera is essential for capturing great weather photos.
Setting Types
This table provides a general starting point, but remember to adjust your settings based on the specific conditions. In rain, a faster shutter speed is key to freezing the raindrops. In fog, a wider aperture allows more light to reach your sensor. In snow, proper exposure compensation is crucial to prevent underexposure. And in sun, a smaller aperture and faster shutter speed help to prevent overexposure.
Advanced Techniques
As a Technical Expert, explains: “Skills enable vision. The more you understand your camera and your tools, the more creative you can be.”
Technique Types
Advanced Methods
- HDR shooting
- Exposure blending
- Advanced gear
- Creative filters
Application Steps
- Scene analysis
- Setting selection
- Tool choice
- Execution plan
For truly stunning results, consider mastering these advanced techniques. HDR shooting involves capturing multiple images at different exposures and then combining them into a single image with a wider dynamic range. Exposure blending is a similar technique that allows you to selectively combine different parts of different images. Creative filters, such as star filters or color filters, can add unique effects to your images.
Expert Insights:
“Don’t be afraid to experiment with different techniques and settings. The key to becoming a great weather photographer is to be willing to learn and adapt.” - Technical Expert
Frequently Asked Questions
Best equipment? Consider:
- Weather type
- Protection needs
- Shooting style
- Budget range
Choosing the right equipment is a crucial step. For rain, prioritize waterproof gear and consider rain covers for your camera and lenses. In foggy conditions, a good lens hood can help reduce flare. For snow, invest in a high-quality polarizer to cut down on glare and enhance contrast. When shooting in harsh sunlight, a sturdy tripod and a reliable set of ND filters are essential. Remember, the best equipment is the one that best suits your needs and budget. Don’t feel pressured to buy the most expensive gear; start with the basics and gradually upgrade as your skills and needs evolve.
Technical settings? Adjust for:
- Light conditions
- Weather type
- Creative goals
- Equipment limits
Mastering the technical settings on your camera is paramount for capturing stunning weather photos. Light conditions play a vital role in determining your aperture, shutter speed, and ISO. In low-light situations like fog or rain, you’ll need to increase your ISO and use a wider aperture to let in more light. Weather type also influences your settings; for example, when shooting snow, you’ll want to use exposure compensation to prevent underexposure. Your creative goals should also guide your settings. Do you want to freeze the action of raindrops with a fast shutter speed, or create a dreamy, blurred effect with a slow shutter speed? Finally, consider the limits of your equipment. Some lenses perform better at certain apertures, and some cameras handle high ISO levels better than others.
Protection methods? Include:
- Gear covers
- Storage solutions
- Transport protection
- Usage practices
Protecting your equipment from the elements is essential for longevity and reliability. Gear covers are a must-have for shooting in rain or snow, providing a waterproof barrier against moisture. Storage solutions like waterproof bags and cases will keep your gear safe during transport and storage. Transport protection is also crucial; consider investing in a sturdy backpack or rolling case with padded compartments to protect your equipment from bumps and jostles. Finally, usage practices play a significant role in protecting your gear. Avoid leaving your camera in direct sunlight for extended periods, and always clean your lenses and sensors regularly to remove dust and debris.
Additional Resources
Educational Materials
- Photography guides
- Weather techniques
- Equipment care
- Creative methods
Inspect into the wealth of knowledge available. Photography guides offer insights into composition, lighting, and camera settings. Weather techniques provide specific strategies for shooting in different weather conditions. Equipment care resources teach you how to maintain and protect your gear. Creative methods inspire you to experiment with new approaches and techniques.
Technical Resources
- Camera guides
- Weather protection
- Technique tutorials
- Equipment reviews
Uncover the technical side of weather photography. Camera guides provide detailed information about your specific camera model and its features. Weather protection resources offer advice on how to safeguard your equipment from the elements. Technique tutorials walk you through step-by-step processes for capturing specific types of weather photos. Equipment reviews help you make informed decisions about purchasing new gear.
Remember: Weather challenges create unique photography opportunities when properly managed. Embrace the elements, learn the techniques, and let your creativity soar.
_


